I have never had the pleasure of being in a darkroom but I'm fascinated by the methods used in the past.
I'm sure I've missed out a lot so those darkroom experts among us at WPS please do correct any errors.
Using ChatGPT and images freely available on the web, I thought it would be interesting to briefly
( and simply) compare the old methods to the new!
Send me your thoughts!
(and any images of your old darkroom stuff)
Shirley
monomagicians@gmail.com
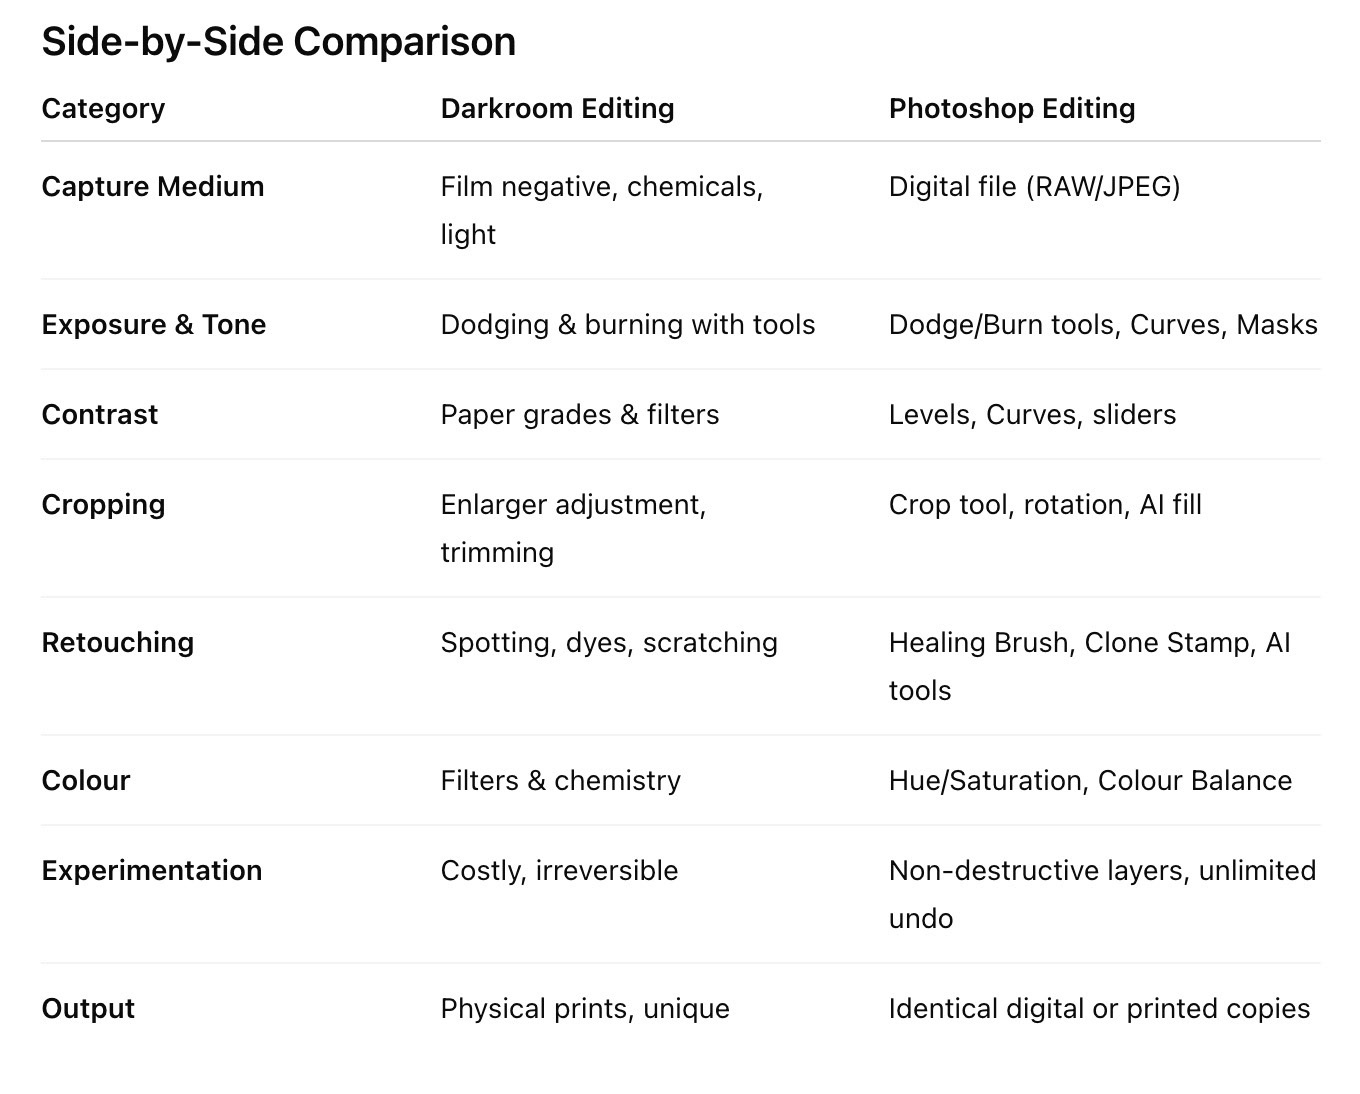
Before the days of Photoshop and Lightroom, photographers shaped their images in the darkroom. While the tools were chemical and physical rather than digital, the creative intent was the same: to refine tone, contrast, and composition until the print matched the photographer’s vision. Interestingly, many of the tools we use in Photoshop today are direct descendants of traditional darkroom techniques.
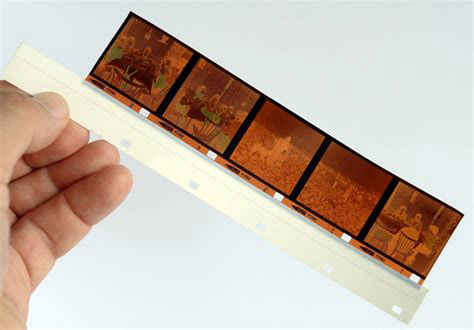
Film negatives — the starting point for every darkroom print.
The Darkroom Workflow
An old photo “ready for editing” in the darkroom usually began as a strip of film negatives. These ghostlike, inverted images contained all the light and shadow information from the camera.
1. Select the Frame:
Photographers used contact sheets (miniature prints of an entire roll) to decide which frames to enlarge.
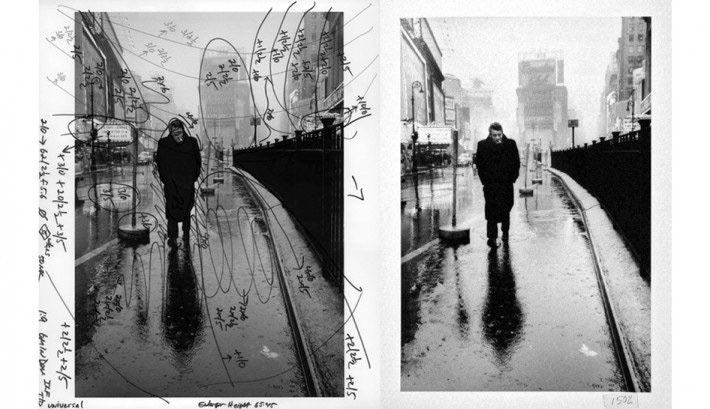
The image is then marked to show where and how much dodging and burning should take place.
Photographers used contact sheets (miniature prints of an entire roll) to decide which frames to enlarge.
The image is then marked to show where and how much dodging and burning should take place.
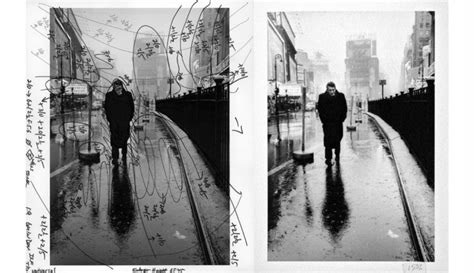
Markings to show where dodging & burning will take place
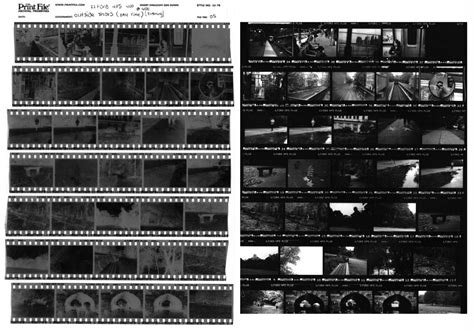
Test Prints – A strip of photo paper was exposed to gauge brightness and contrast.
2. Test Prints:
A strip of photo paper was exposed to gauge brightness and contrast.
3. Dodging & Burning:
By holding back light (dodging) or adding more (burning), photographers shaped shadows and highlights.
By holding back light (dodging) or adding more (burning), photographers shaped shadows and highlights.
4. Retouching:
Dust or scratches were carefully painted out with dyes or spotted by hand on prints.
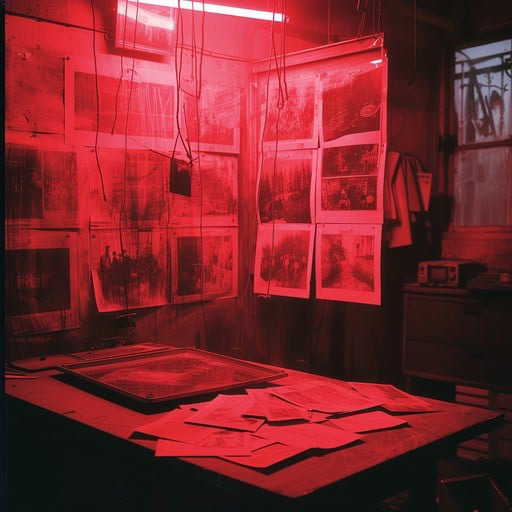
5. Print:
Once perfected, the photo was developed in trays of chemicals under the glow of a red safelight.
A print emerging from a chemical tray in a traditional darkroom.
Photoshop: The Digital Darkroom
Fast forward to today, and Photoshop acts as a virtual darkroom, but with near-infinite possibilities:
Dodge and Burn Tools replace waving a hand under the enlarger.
Curves and Levels replace contrast filters and graded papers.
Crop & Rotate tools make reframing effortless compared to trimming a print.
Clone Stamp and Healing Brush do the work of hours of spotting by hand.
Colour Adjustment tools replace the finicky chemistry of colour printing.
Layers and Masks make the process non-destructive, meaning you can experiment endlessly with no wasted paper.
What once required chemicals, patience, and repetition can now be achieved in seconds, with total control and perfect repeatability.
Why This History Matters
Understanding the darkroom roots of photo editing gives us a deeper appreciation for the tools we take for granted today. When you use Photoshop’s Dodge tool or adjust a Curve, you’re actually borrowing from decades of traditional darkroom craft.
The darkroom demanded patience, planning, and a respect for process. Photoshop gives us freedom, flexibility, and speed. Together, they tell the story of how photography has evolved—while reminding us that the real art lies in the photographer’s vision, not just the tools.
✨ In short: The philosophy hasn’t changed—only the medium. Whether in the glow of a red safelight or the glow of a monitor, photographers are still shaping light to tell stories.
Classic Dark Room Tools
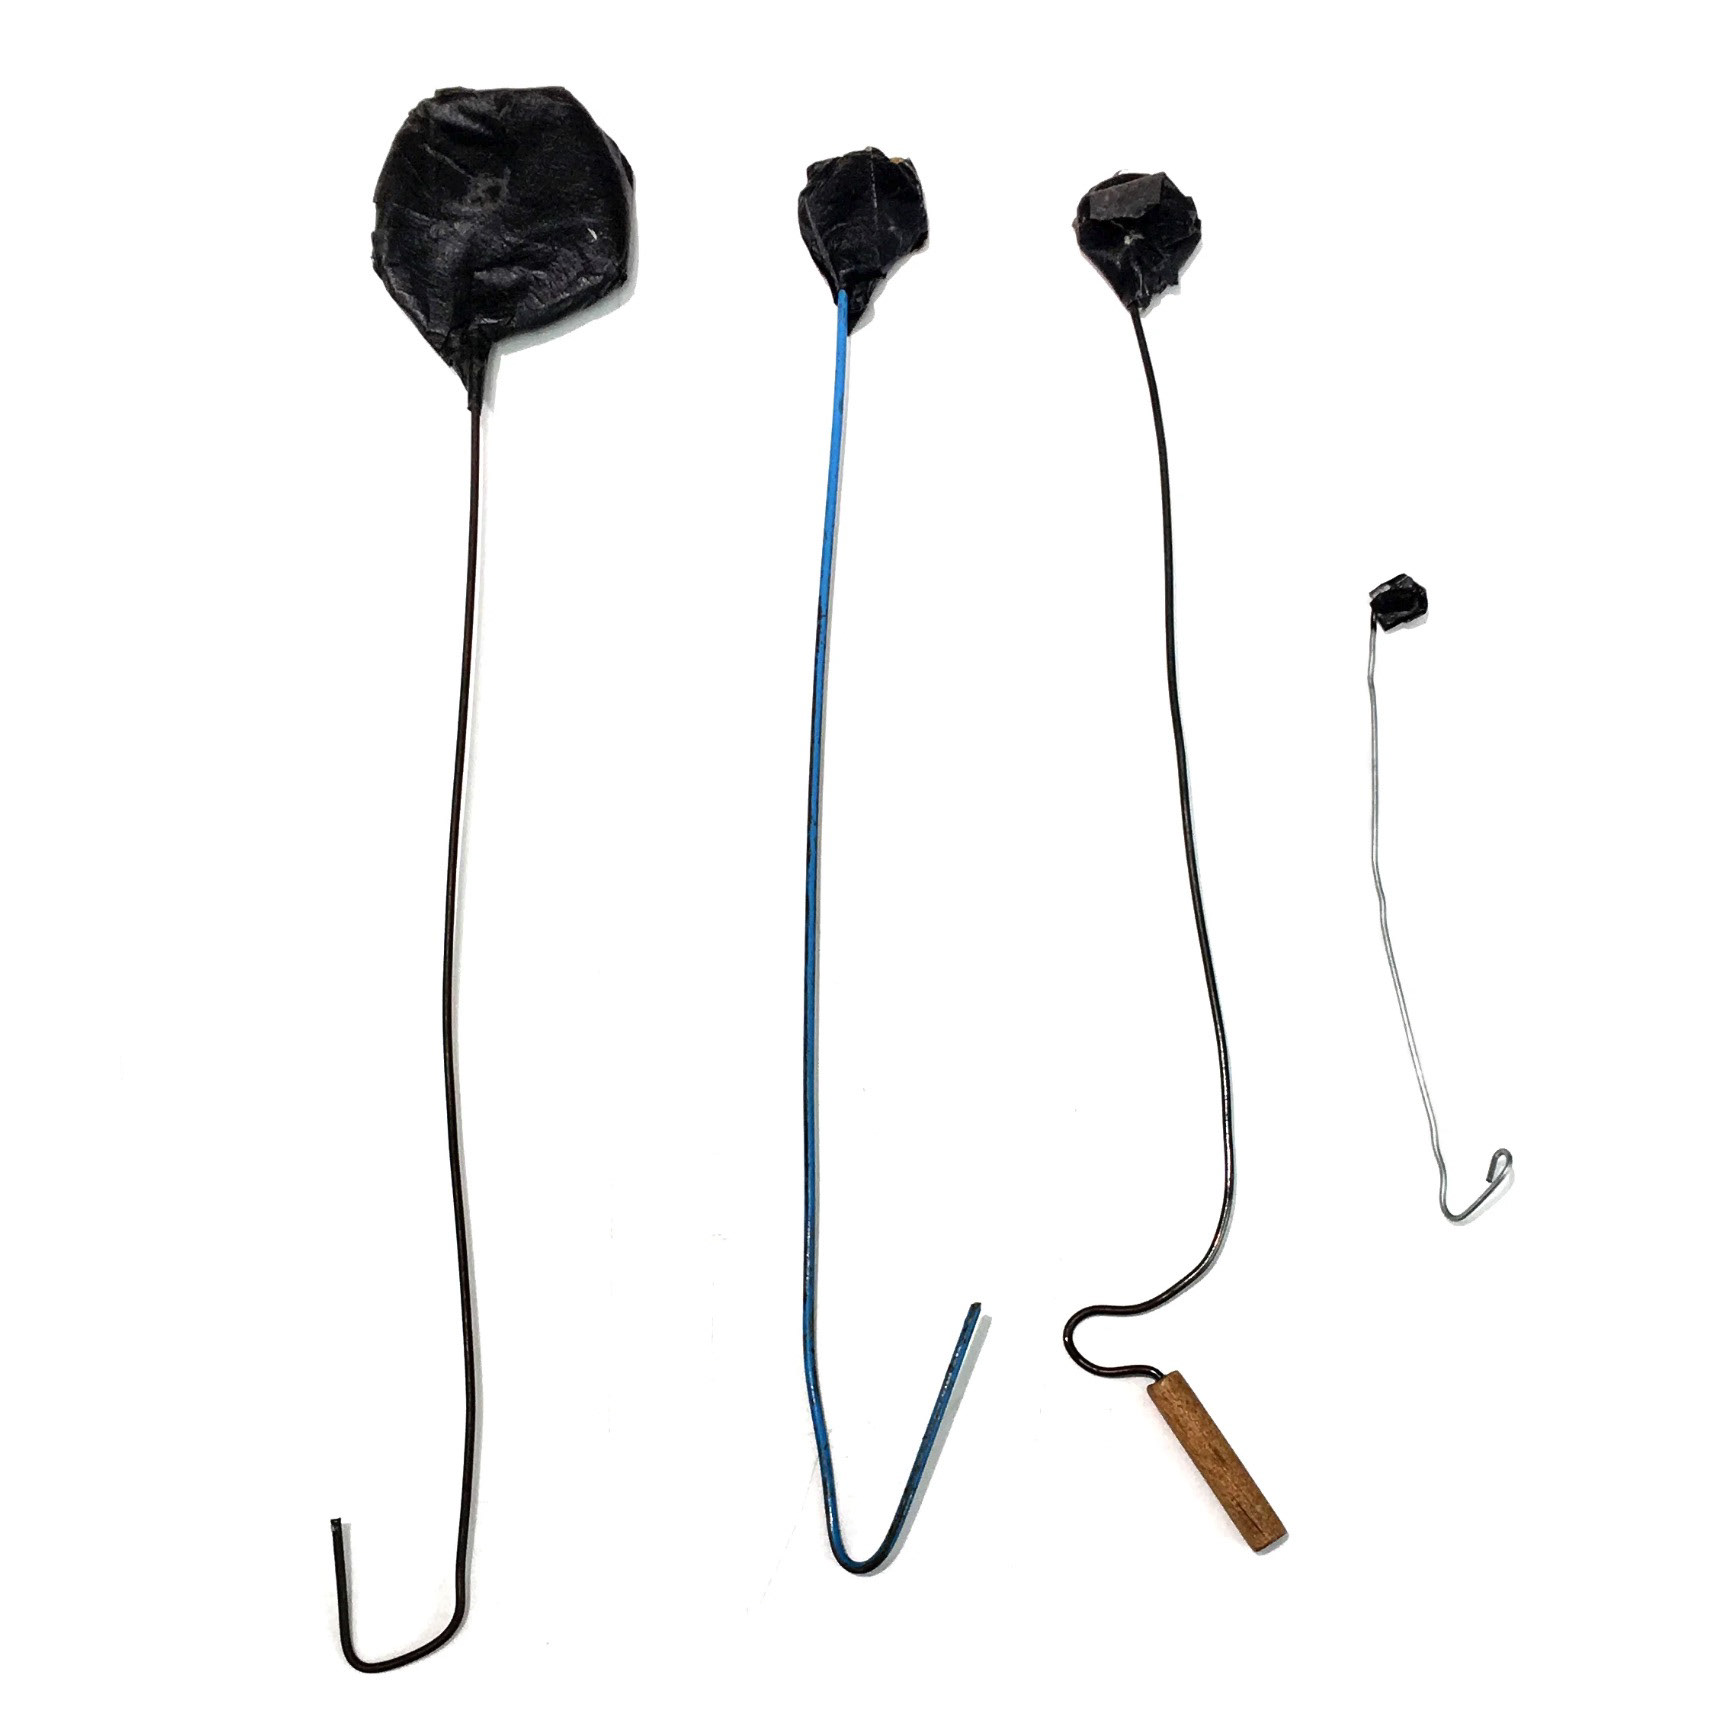
Classic Handmade Tools
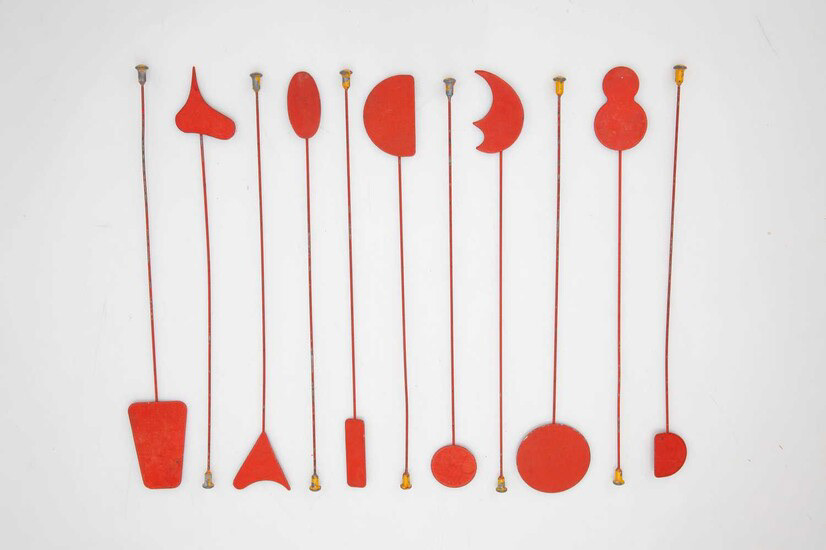
Factory Made Variety Set

Darkroom Display Setup
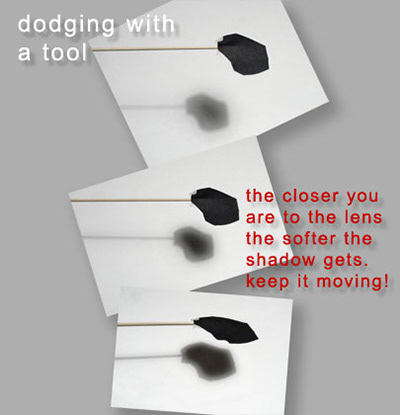
Dodging Technique Illustration
Above are four examples of vintage dodging and burning tools used in traditional darkroom printing.
Classic Handmade Tools
Simple wands with wire handles and cardboard or cloth tips—improvised for fine control during exposure manipulation. These were intentionally kept in motion to avoid hard shadows.
Simple wands with wire handles and cardboard or cloth tips—improvised for fine control during exposure manipulation. These were intentionally kept in motion to avoid hard shadows.
Factory-Made Variety Set
A beautiful collection of purpose-made tools in various shapes (circles, crescents, rectangles) mounted on long handles. These allowed printers to apply consistent shapes and achieve different tonal effects.
A beautiful collection of purpose-made tools in various shapes (circles, crescents, rectangles) mounted on long handles. These allowed printers to apply consistent shapes and achieve different tonal effects.
Darkroom Display Setup
An array of dodging and burning tools neatly hanging on a darkroom wall—showcasing both creative DIY tools and professionally made variants, ready for use.
An array of dodging and burning tools neatly hanging on a darkroom wall—showcasing both creative DIY tools and professionally made variants, ready for use.
Dodging Technique Illustration
A step-by-step visual demonstrating how tool distance alters shadow softness—with tips on how moving it closer to or farther from the enlarger softens or sharpens the light transition.
A step-by-step visual demonstrating how tool distance alters shadow softness—with tips on how moving it closer to or farther from the enlarger softens or sharpens the light transition.
Context Behind the Tools
Dodging and burning were fundamental darkroom techniques for selectively adjusting tonal values:
Dodging involves reducing local exposure (to lighten areas), while burning increases exposure to darken parts of the print. Tools ranged from simple wires or cardboard shapes to custom-made devices with varying levels of finesse.
The key to seamless tonality was keeping the tool in motion,
this “feathering” prevented visible edges or halos on the print.
this “feathering” prevented visible edges or halos on the print.
Photographers often improvised tools:
Cardboard on broomsticks, wire frames, or even hand shadows—showcasing ingenuity and adaptability.
Cardboard on broomsticks, wire frames, or even hand shadows—showcasing ingenuity and adaptability.
All info above written with the help of ChatGPT.
All images are freely available on the web.
All images are freely available on the web.
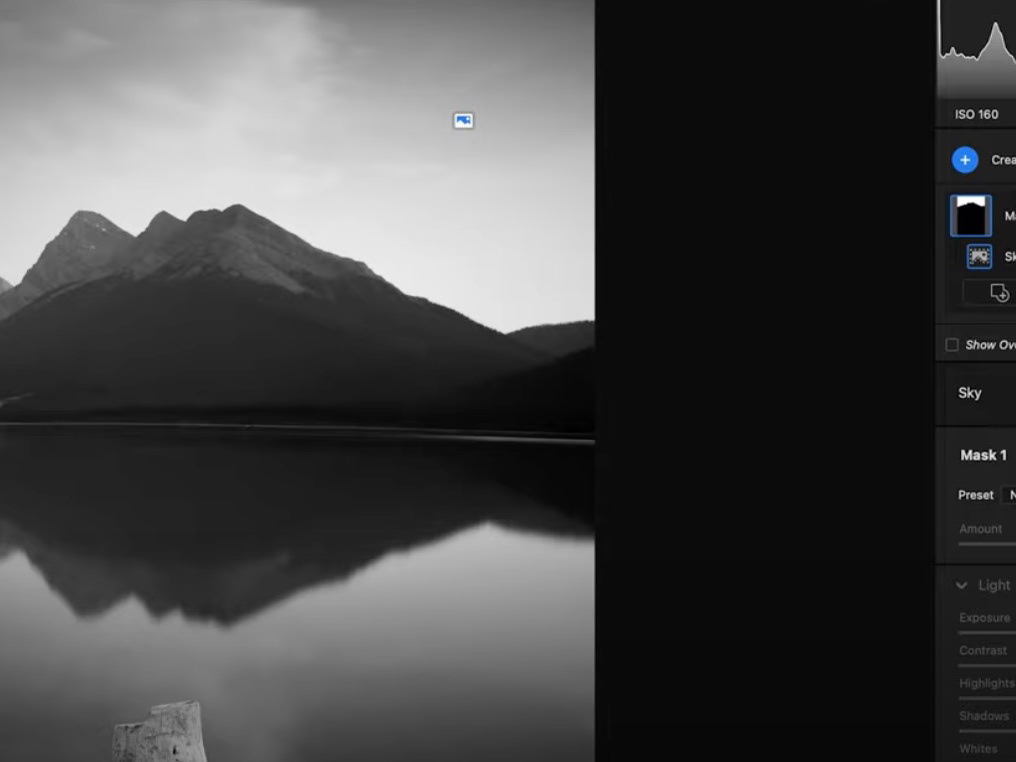
To get really in depth information on editing monochrome images,
I thoroughly recommend that you watch the Webinar
'Monochrome Is Not a Filter' by Adrian Lines
on the Photoclub247 website.
I thoroughly recommend that you watch the Webinar
'Monochrome Is Not a Filter' by Adrian Lines
on the Photoclub247 website.